
Photo by Ben Griffiths on Unsplash
Deploying a Laravel Application to EC2 with RDS: A Comprehensive Step-by-Step Guide
Discover step-by-step instructions on deploying Laravel applications with Amazon RDS on AWS. Learn how to create, configure, and connect your RDS inst


Table of contents
- Types of RDS Deployment
- Create an RDS in AWS
- Configuring packages in EC2 instance
- Cloning your Code OR Create a new Project
- Run Database Migration, Connect Application with RDS
- Provide Credentials to Application
- Start the Laravel Application
- Configure Laravel Applications with Apache2
- Configure Virtual Host
- Adding A record to your Domain Provider
- Modify the owner of Storage and Cache directories
- Configure SSL for your Laravel Application
- Generate SSL Certificate
Types of RDS Deployment
| Deployment options | Description |
| Multi-AZ DB Cluster | Creates a DB cluster with a primary DB instance and two readable standby DB instances, with each DB instance in a different Availability Zone (AZ). Provides high availability, data redundancy, and increased capacity to serve read workloads. |
| Multi-AZ DB instance | Creates a primary DB instance and a standby DB instance in a different AZ. Provides high availability and data redundancy, but the standby DB instance doesn't support connections for read workloads. |
| Single DB instance | Creates a single DB instance with no standby DB instances. |
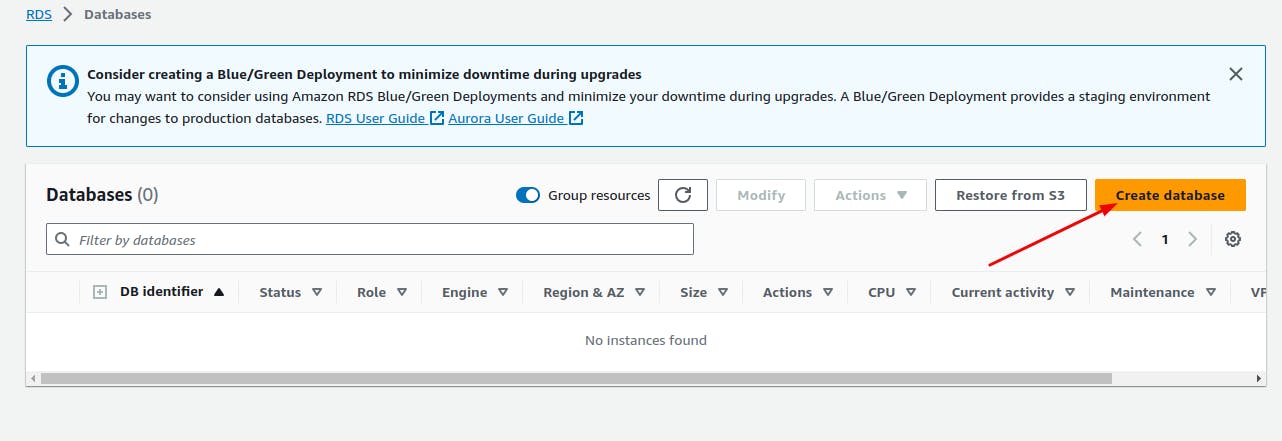
Create an RDS in AWS


choose the MYSQL engine version that requires your application

and if you choose Template either Production or Dev/Test then you would also need to select an option for Availability and durability

also, you can change the DB instance class (allocation of the computational, network, and memory capacity required by planned workloads of this DB instance.)
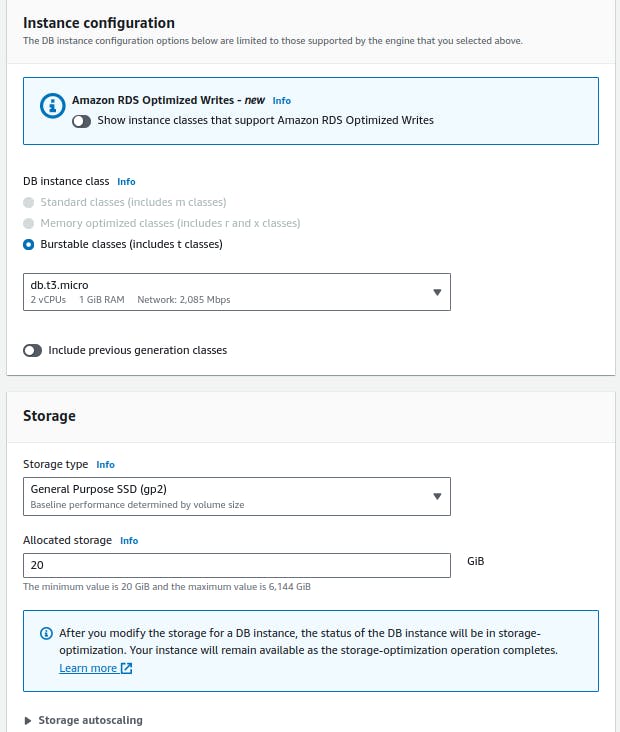
keeping everything default
chooses No so that the DB instance isn't publicly accessible, For security, it is a best practice to keep the database private and make sure it isn't accessible from the internet


Database creation will take some time, after successfully creation of RDS we need to create a new Database for our application and create a new user for the application
Allow Incoming Request to an RDS from EC2
To allow incoming requests from an EC2 instance to an Amazon RDS instance, you need to configure the compute resource in an RDS dashboard, scroll down, and click on setup EC2 connection

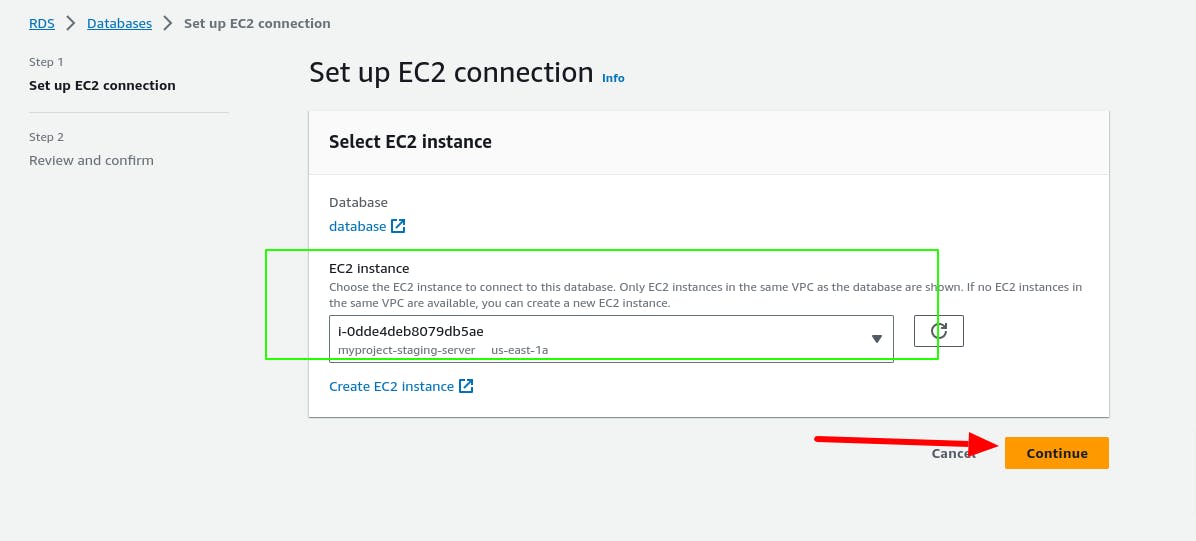
.

AWS is Adding new security groups in EC2 (ec2-rds-1)and RDS (rds-ec2-1) to allow communication between them

Prepare the Database in RDS
Connect to an RDS
Connect with your newly created RDS MySQL database with the username (admin by default), hostname (From the Connectivity Tab in RDS Console ), and password you chose at the creation time of MySQL in the AWS RDS service
Change the host URL from your RDS from the connectivity Tab in the AWS RDS console
#installing MySQL client if not available
sudo apt install mysql-client
# First time login into RDS MySQL
mysql -u admin -h [HOST] -p

Create a Database, User, and Give Privileges
We are Creating a non-administrative user for an Application usage and giving it the least privileges.
Create a Database and user for our Laravel application, and also give the user the least privileges it requires for application to the new database (in my case app_database)
CREATE DATABASE app_database;
CREATE USER 'db_user'@'%' IDENTIFIED BY 'password-change-me';
GRANT SELECT, INSERT, UPDATE, DELETE, CREATE, DROP, REFERENCES, ALTER, INDEX ON app_database.* TO 'db_user'@'%';
FLUSH PRIVILEGES;
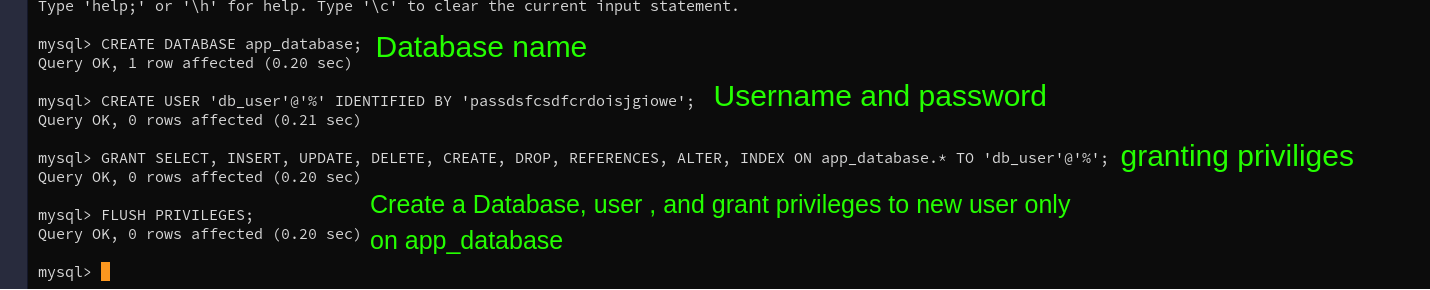
At this step, we are done with our Database setup.
Configuring packages in EC2 instance
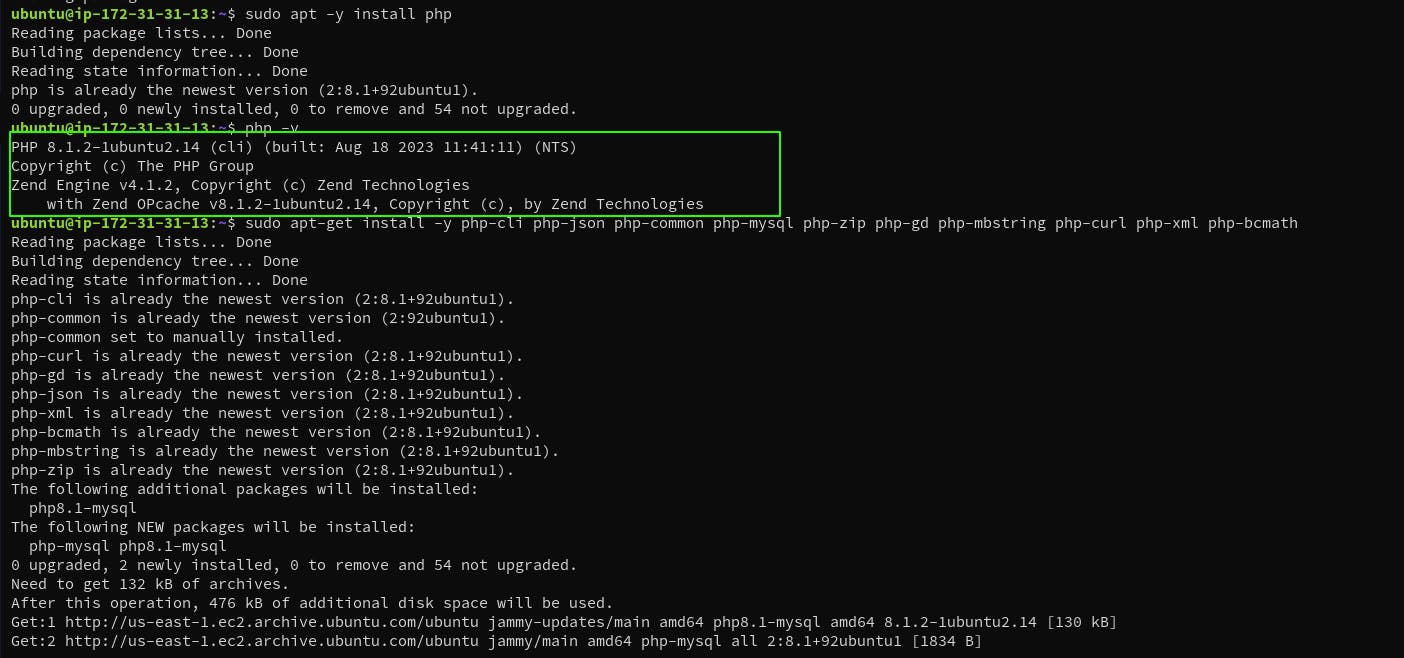
Installing PHP
Assuming you have launched an EC2 of your configuration with Ubuntu AMI, connect to it using SSH. Use the private key you choose when creating.
Follow the below steps to Install PHP, This will install to latest PHP version available to the Ubuntu repository.
sudo apt-get update
sudo apt -y install php
# Verify
php -v
# Installing extra module, extension may require,
sudo apt-get install -y php-cli php-json php-common php-mysql php-zip php-gd php-mbstring php-curl php-xml php-bcmath
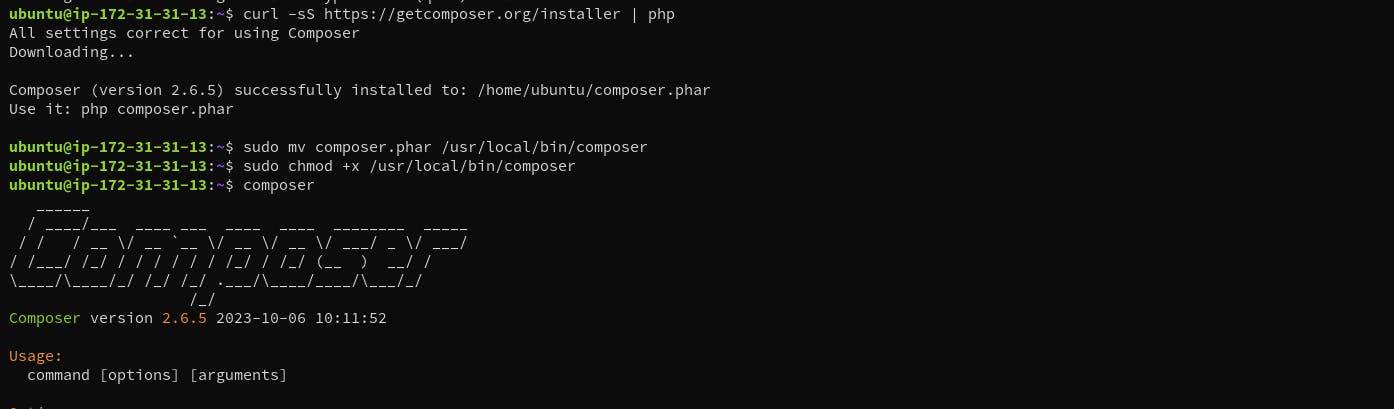
Installing composer
Installing composer for Laravel project
curl -sS https://getcomposer.org/installer | php
sudo mv composer.phar /usr/local/bin/composer
sudo chmod +x /usr/local/bin/composer
Cloning your Code OR Create a new Project
git clone https://github.com/Azure-Samples/laravel-tasks.git
cd laravel-tasks
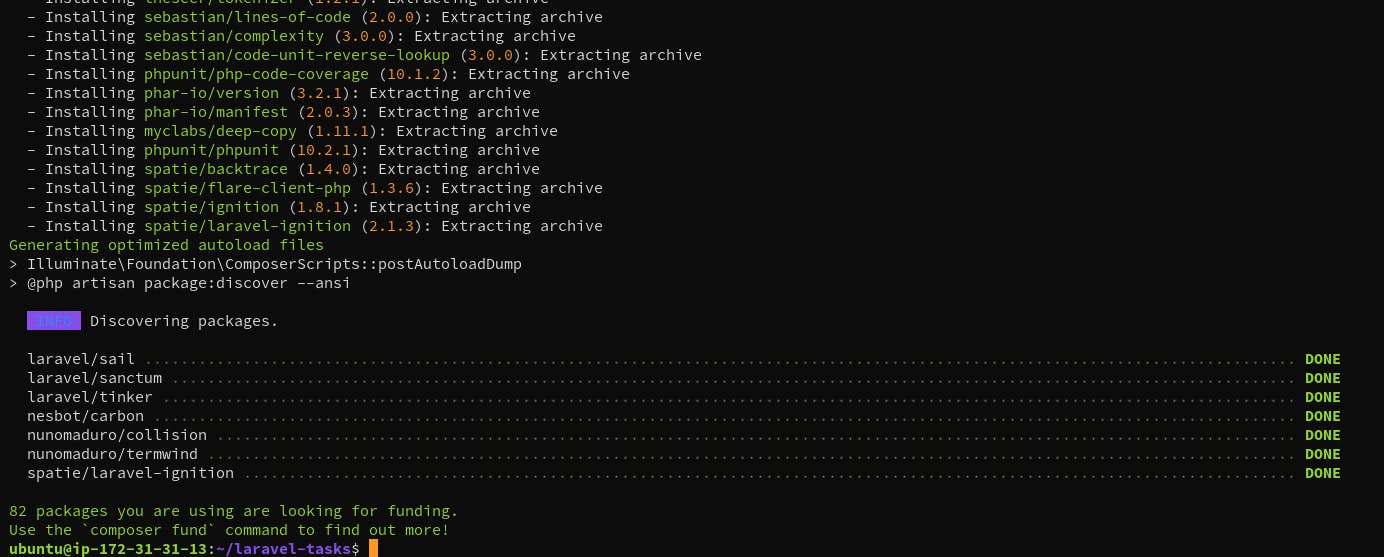
Install dependencies with the following commands
composer install
php artisan key:generate

Run Database Migration, Connect Application with RDS
In most of the real projects in Laravel, we need to run the migration before starting the application
php artisan migrate

Provide Credentials to Application
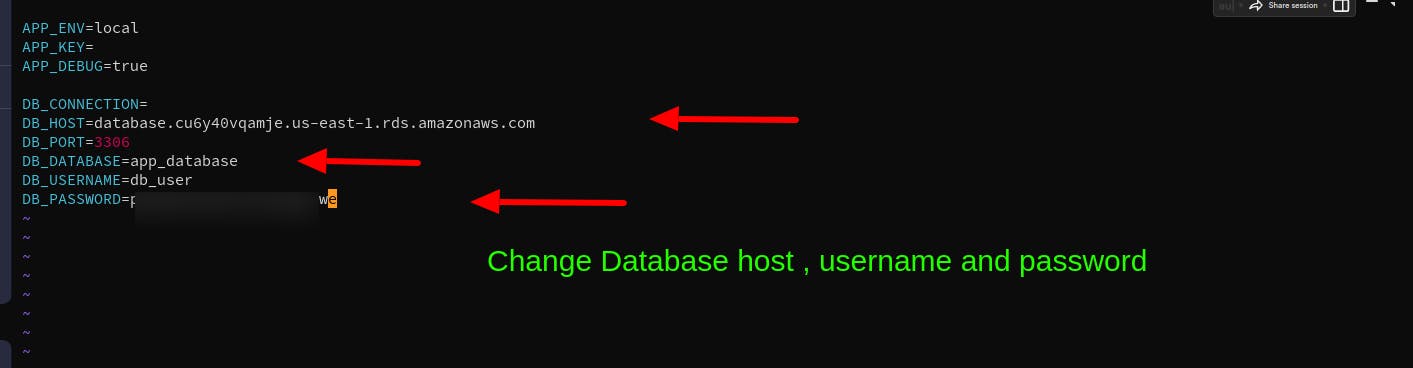
It is recommended to use AWS Secret Manager But in this demo, we are keeping secrets in an env file.
In .env, configure the database settings (like DB_DATABASE, DB_USERNAME, and DB_PASSWORD) using settings that you create after connecting to RDS
php artisan migrate

now we have run run migrations which means our application has RDS database access
Start the Laravel Application
php artisan serve --host=0.0.0.0
Access the application at the IP address at Port 800
Our Application is running fine, lets setup this up with Apache2

Configure Laravel Applications with Apache2
Install Apache2
sudo apt install apache2
Create a Project directory
sudo mkdir /var/www/laravel-tasks
Assuming the project was initially configured at /home/ubuntu directory
copy all your Project files and folders to /var/www/laravel-tasks
sudo cp -r /home/ubuntu/laravel-tasks/ /var/www/laravel-tasks/


Configure Virtual Host
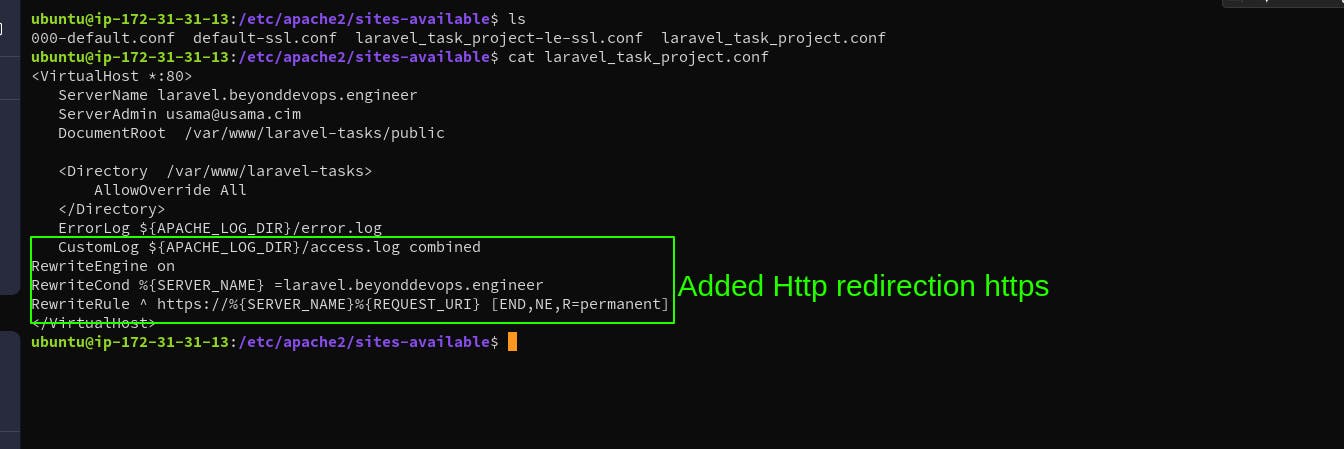
create a New site in Apache2 in/etc/apache2/sites-available/laravel_task_project.conf Paste the below Apache conf in the file and replace it with your domain
<VirtualHost *:80>
   #Replace with your Domain Name
   ServerName laravel.beyonddevops.engineer
   ServerAdmin usama@usama.cim
   DocumentRoot  /var/www/laravel-tasks/public
   <Directory  /var/www/laravel-tasks>
       AllowOverride All
   </Directory>
   ErrorLog ${APACHE_LOG_DIR}/error.log
   CustomLog ${APACHE_LOG_DIR}/access.log combined
</VirtualHost>
Disable the default Apache2 site
sudo a2dissite 000-default.conf
enable the new virtual host
sudo a2ensite laravel_task_project
Enable the Apache rewrite module, and finally, restart the Apache service:
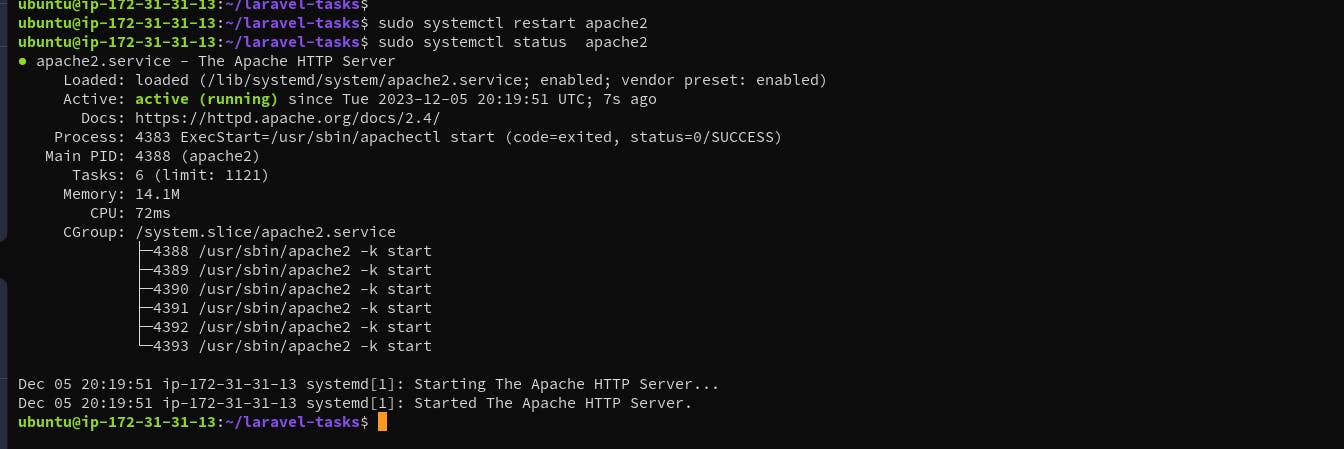
sudo a2enmod rewrite
sudo systemctl restart apache2
Adding A record to your Domain Provider
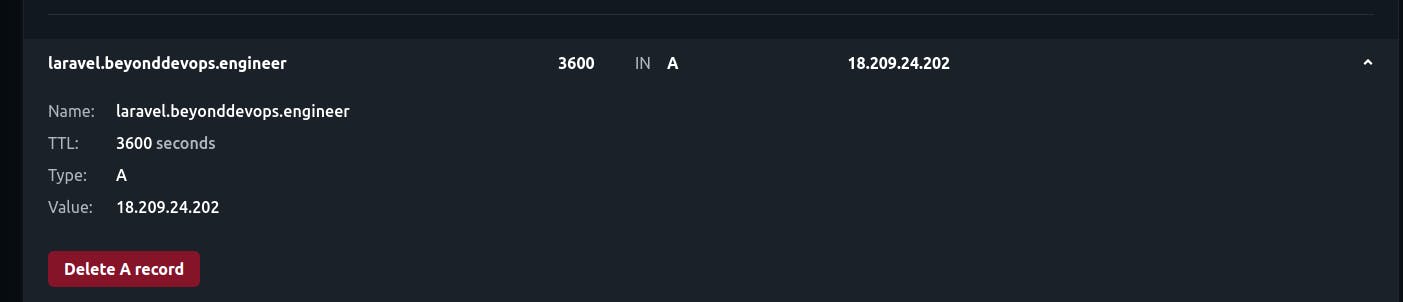
you need to set A record to your Domain Provider domain name or subdomain, whatever you choose in serverName in laravel_task_project.conf file,
in my case
subdomain laravel.beyonddevops.engineer points to (IP ADDRESS OF EC2)
Sometimes DNS entry may take time Verifying your change with https://dnschecker.org/

Now Access your Site from your Domain name
you will get this error due to permissions
The stream or file "/var/www/laravel-tasks/storage/logs/laravel.log" could not be opened in append mode: Failed to open stream: Permission denied The exception occurred while attempting to log: The stream or file "/var/www/laravel-tasks/storage/logs/laravel.log" could not be opened in append mode: Failed to open stream: Permission de
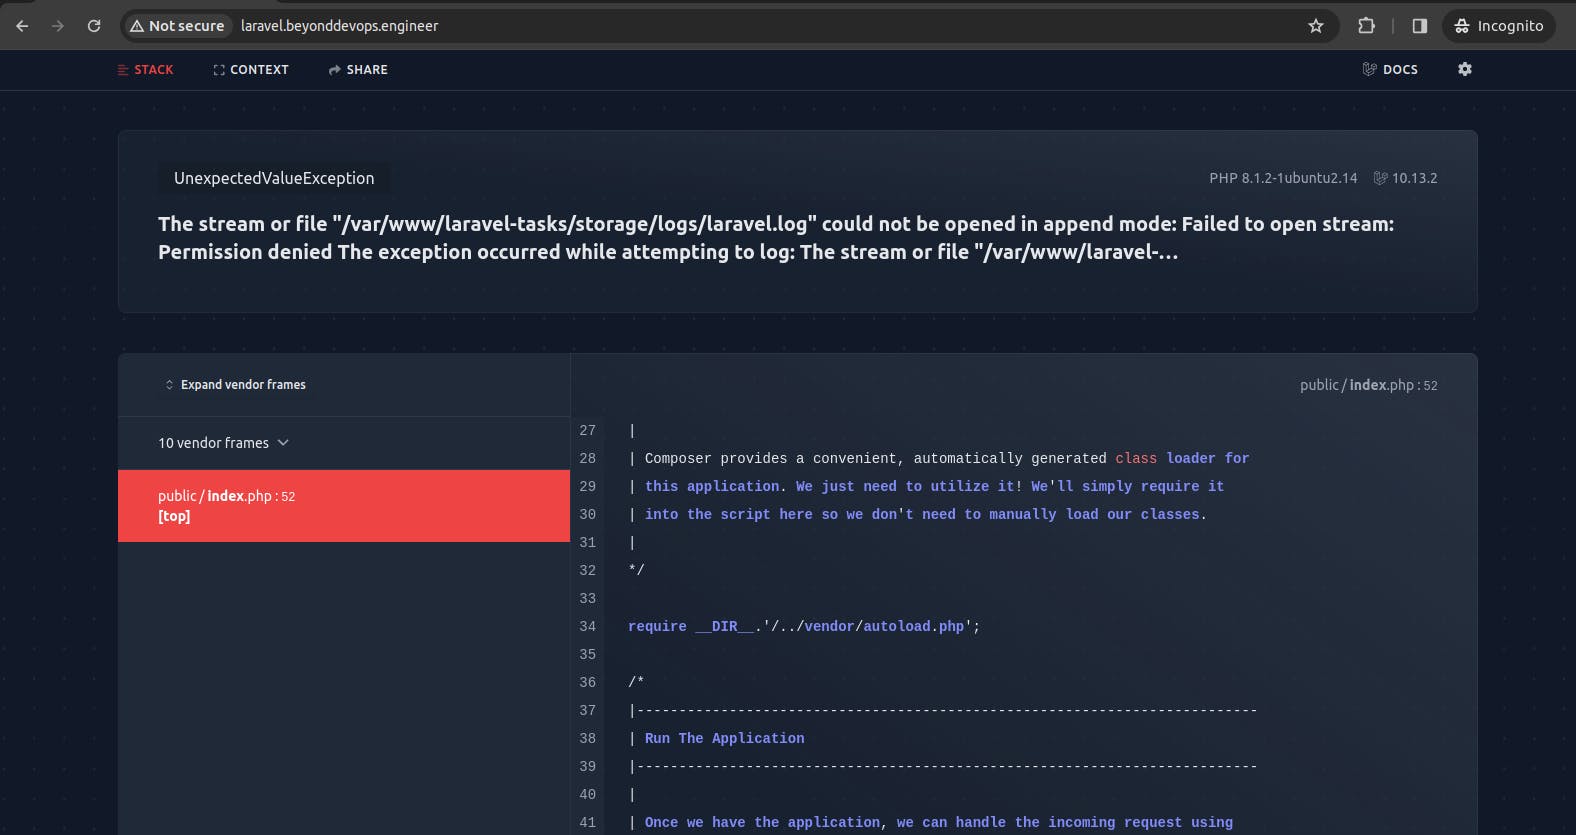
We need to give the web server (which is serving Laravel Application ) user write access to the storage and cache folders, where Laravel stores application-generated files
Modify the owner of Storage and Cache directories
sudo chown -R www-data.www-data /var/www/laravel-tasks/storage
sudo chown -R www-data.www-data /var/www/laravel-tasks/bootstrap/cache

Configure SSL for your Laravel Application
To configure SSL for your Laravel application using Certbot on an Ubuntu server with Apache, follow these steps
Run the following command to install Certbot and the Apache Certbot plugin
sudo apt install certbot python3-certbot-apache

Before Running the below command please make sure Port 80,443 is open from everywhere, which is required for Lets Encrypt to issue your web server the certificate
Generate SSL Certificate
sudo certbot --apache

Here is what Certbot has done to your configuration
Modify your /etc/apache2/sites-available/laravel_task_project.conf
created certificate and private key file inside
/etc/letsencrypt/live/laravel.beyonddevops.engineer/
create a new configuration file for SSL

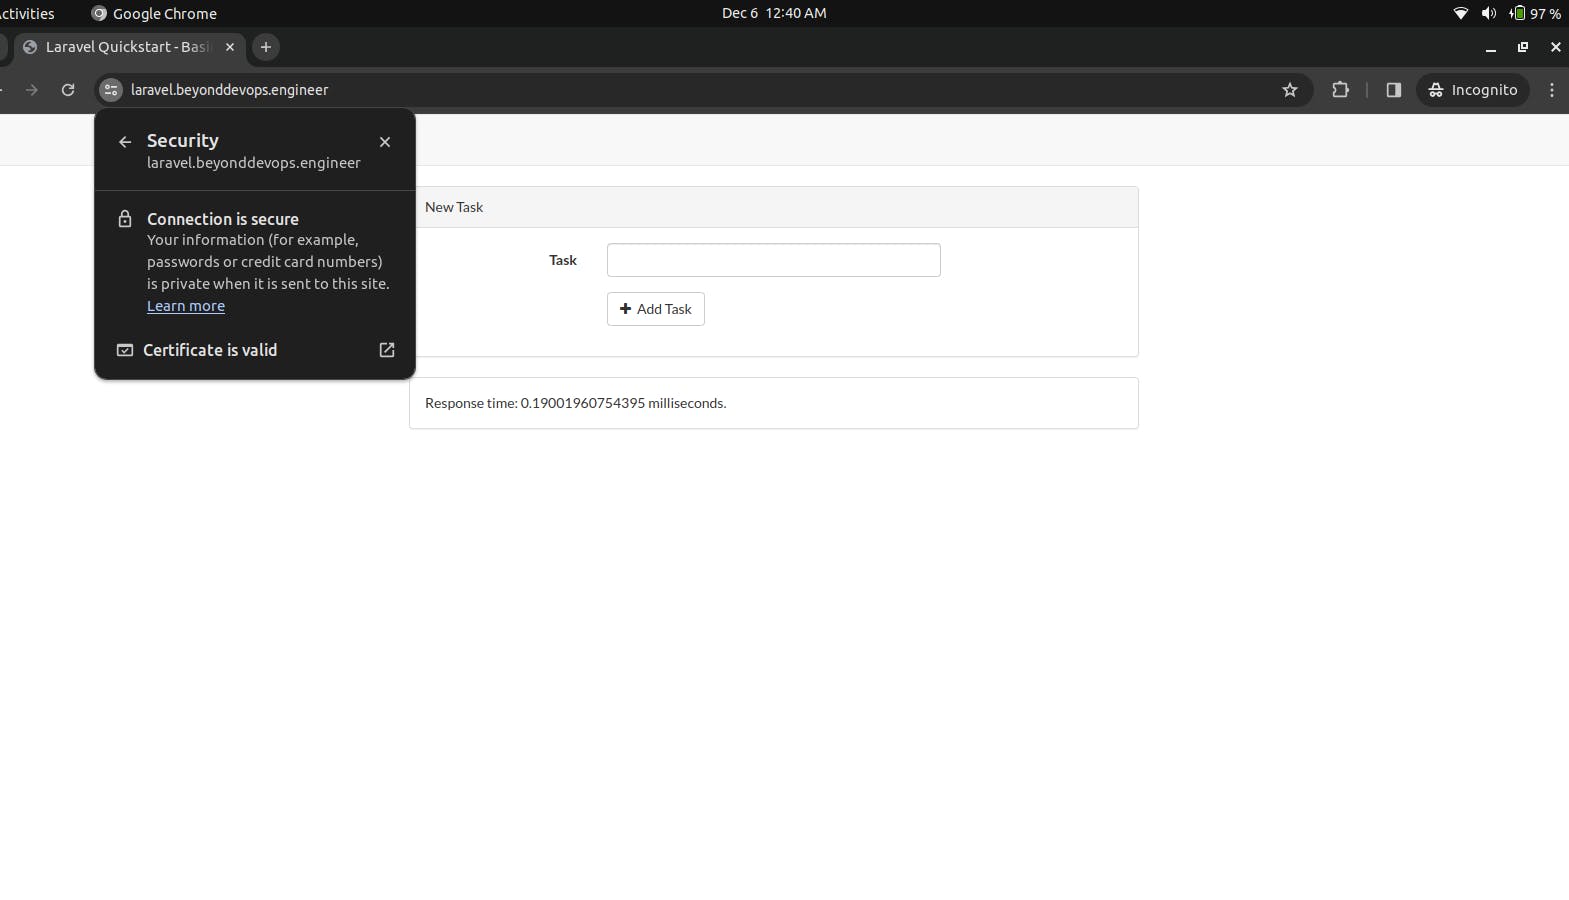
Visit your domain using a web browser. You should see a padlock icon indicating that the connection is secure
It should also redirect HTTP to HTTPS, just make sure you have inbound traffic open to your security groups of EC2